Monday, July 30, 2012

My Fancy New Kitchen & Plum Cake Dad, really?!


So as I mentioned, my family came to visit me recently right before my kitchen remodel was finished, and from the moment they got here, my Dad was going on about Plum Cake. That was the first time I had ever heard of such a thing, but he was insisting that my Mom used to make it all the time. This would probably be a good time to admit the fact that, my mother does not like to cook. Surprising, I know, but my parents own restaurants, so she has never really had to cook. Since I've never seen a boxed Plum Cake, I was skeptical that my Mom had ever actually made such a thing. My Dad explained that they used to make a boxed Plum Cake and she would bake that and Spice Cake. I definitely remember loving her Spice Cake, but the Plum Cake is still debatable. Anyhow, my Dad had found a Plum Cake recipe in the local newspaper along with a bag of black plums and we got to work. At first, it sounded weird to me, but after I thought about it, plums are similar to peaches which are in all kinds of delicious desserts. I was a little concerned that the tart skin might not be so appealing, but it actually turned out to be a super moist and flavorful cake without being overly sweet. The skin actually added a beautiful color to the cake as well, so needless to say, I was delighted with the final result. Good call Dad! :)


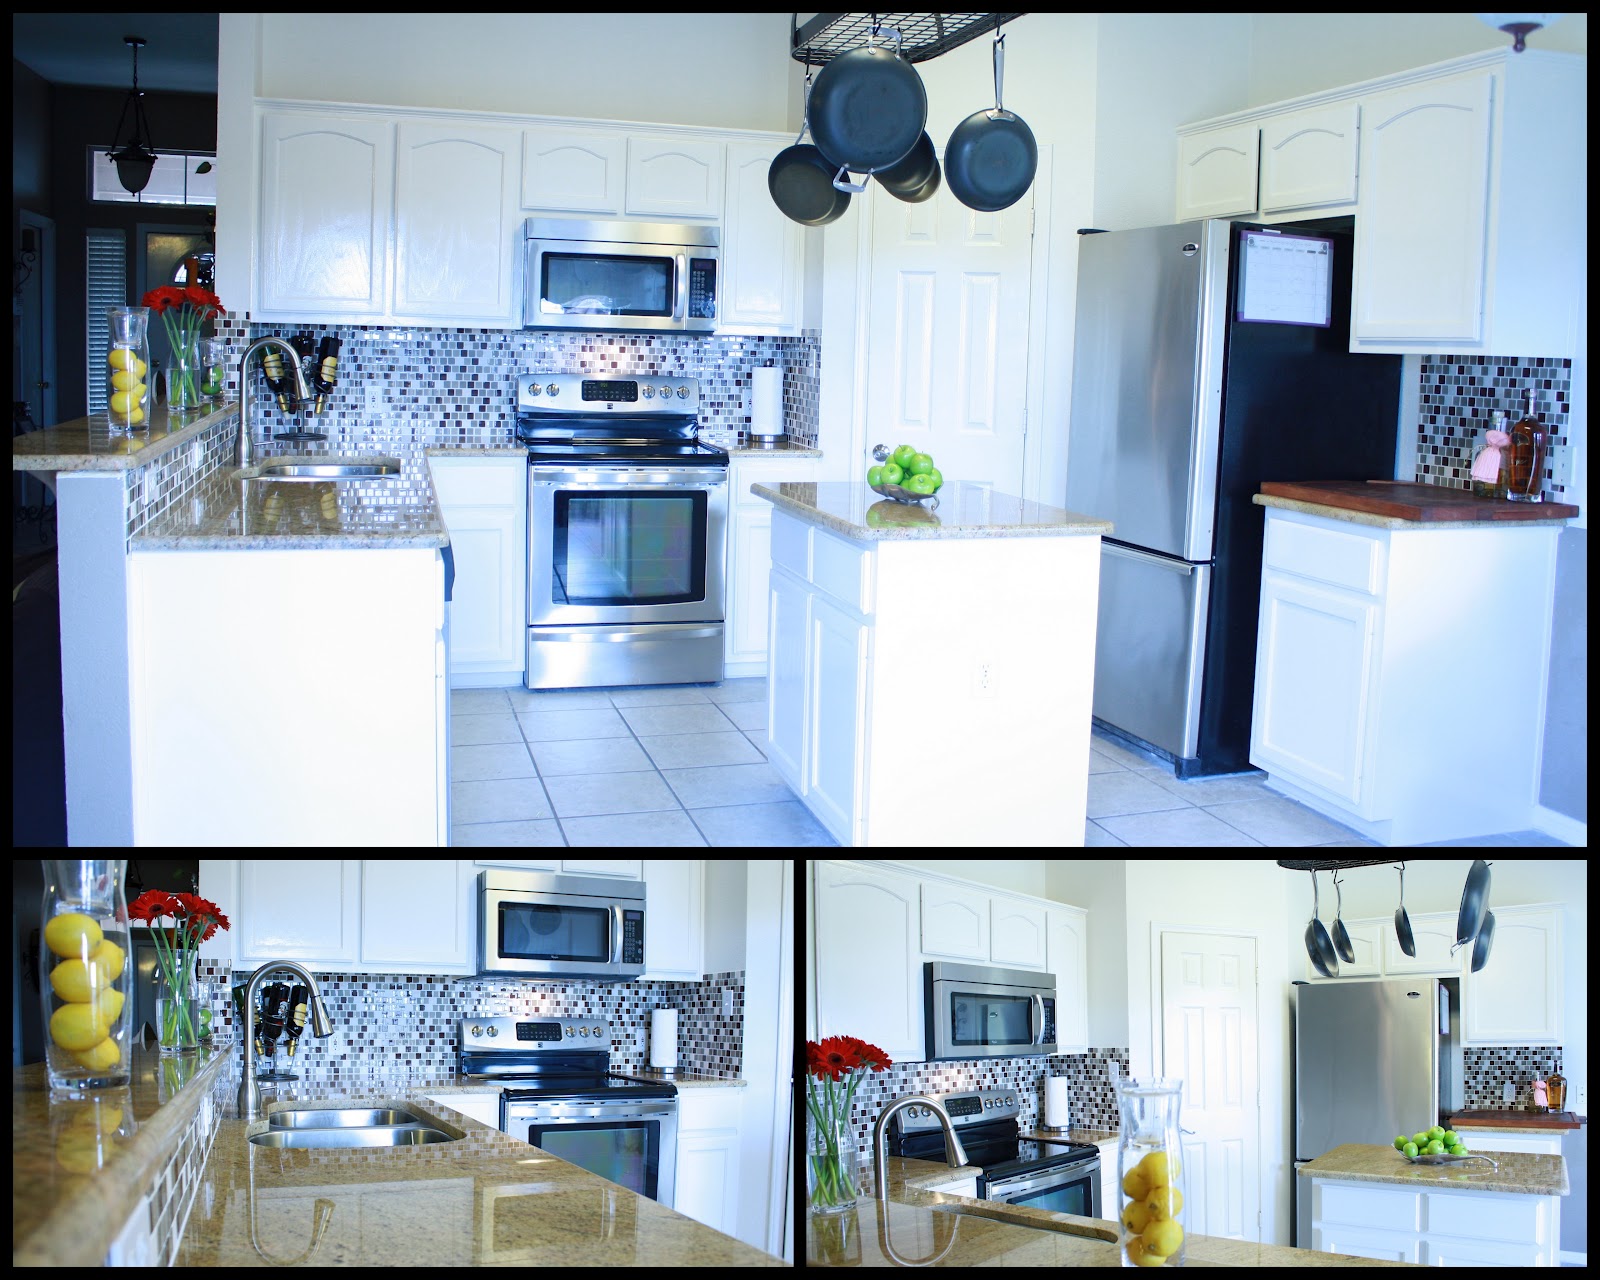
Now, about the kitchen...I love it!! My sweet husband worked so hard to get it done as soon as possible because he knew how much I would miss it, but I don't think he realized how much he would miss my cooking until we were eating out every night. As you can see, we upgraded the counter tops, added a back splash, got a new microwave, a new sink & faucet and repainted all of the kitchen cabinets. I'll admit it was kind of a pain in the ass even though Jimmy did most of the work, but just dealing with the mess was a hassle in itself. Thankfully, it turned out to be totally worth it because I think it looks absolutely beautiful. I may just have to make his favorite meal in heels and something cute to repay him! ;)


Plum Cake Recipe:
1 1/2 sticks unsalted butter, softened
1 1/4 cups sugar
4 eggs
1 teaspoon vanilla extract
1/2 teaspoon almond extract
1 1/4 cups flour
1/4 cup cornstarch
2 teaspoons baking powder
1/2 teaspoon iodized salt
about 7 black plums, cut off the ends of each (like the piece in the pic) then pit, peel & chop the rest
2 tablespoons powdered sugar

Heat oven to 350 degrees. Butter a 9-inch springform pan, dust with flour and tap out the excess. Beat the butter and sugar until light and fluffy. Beat in the eggs one at a time, beating well after each addition. Stir in the vanilla and almond extracts. In a separate bowl, sift together flour, cornstarch, baking powder and salt. Slowly mix in the dry ingredients with the butter mixture. Take the peeled & chopped plum flesh and fold it into the batter. Spread the batter in the prepared pan. Arrange plum butts cut side down on top of the batter. Bake for 45-50 minutes, or until the cake is lightly browned on top. Note that the plum butts will sink into the cake, that's supposed to happen. Transfer to a wire rack and let cool for about 5 minutes, then run a knife around the sides of the cake to loosen it from the pan. Cool for 30 more minutes, then dust with the powdered sugar and enjoy!

Recipe adapted from San Antonio Express Newpaper
My favorite taste testers and biggest fans! 


Friday, July 20, 2012

One Pot + 7 Ingredients = Chicken Tacos


Tacos, tacos, tacos!!
It was such a nice surprise having my family come visit Jimmy & me last weekend, but I was a little bummed that my kitchen still wasn't fully restored from the remodel. As of today, however, the kitchen is complete! I'm thrilled at the way it turned out all thanks to my super hard working hubby and will be sharing pics soon. 
Having my whole family here at home with me doesn't happen too often, so it made me happy which in turn made me want to feed them! With my cooking stuff spread out between the guest room and the garage, I knew I would have to make simple meals that wouldn't require too many dishes or gadgets. I had a bunch of chicken thigh meat in the freezer, so with some other ingredients I had on hand, I was able to make these hearty tacos without much fuss. I just threw everything in my trusty dutch oven & let it cook while I joined my Mom & sister for a day of shopping. We came home to a house that smelled of Mexican deliciousness and all chowed down! So next time your loved ones visit you at home, whip up this easy dish that will have them wanting to visit you more often!

My sweet baby nephew so wanted to get his little hands on these, so you know they were good!!

Isn't my taco holder neat? I got it as gift for our 5th wedding anniversary from a long time friend & I love it!


Ingredients
1 pound boneless chicken thigh or breast meat
1 can diced tomatoes with chiles
(I used Rotel-Hot)
1/2 large yellow onion, sliced up
1 1/2 cups chicken stock
1 bay leaf (I prefer using fresh when possible)
3 tablespoons chicken taco seasoning
(or your own combination of cumin, garlic & chili powders)
Handful of fresh chopped cilantro
Kosher salt & course ground black pepper (Which don't count as "ingredients" since they go in practically everything!)

To make the chicken taco meat, either use a slow cooker or a heavy pot with a lid like my lovely red dutch oven. Add full chicken thighs or breasts, the can of tomatoes with juice, the onion slices, chicken stock, bay leaf & taco seasoning in the pot. Liberally (at least one tablespoon each) add the kosher salt & pepper then stir it all together to combine. Put the lid on the pot and place it in the oven at 300 degrees for about 2-3 hours. If you need it to cook longer, say you want to throw it in early then use it for dinner, lower the temp to about 200. My oven has a slow cook function that can be set at either low or high, so that's what I used. Once the chicken is almost done, add the cilantro so it keeps that nice green color and bright flavor. (I didn't add much because my Mom's not a fan, so you can't see much of it in the pic.) Of course you can also just toss it in with the other ingredients at the beginning if you want. Be sure to taste the meat once it's cooked to be sure the flavor is good. Remember you can always add salt, but too much will ruin your hard work.

Once the meat has cooked down so much it falls apart on its own, it is done. Stir it around to break up any big chunks, but it shouldn't take much effort for the chicken to break down into stringy pieces like in the pics. Take out the bay leaf and drain the meat well if there is still a lot of juice before serving. 

Corn tortillas, lettuce, tomatoes, sour cream & shredded cheese obviously put the ingredients well over 7 items, but these are all things that can be switched up to make the dish your own. For example, try crema oaxaquena or crema fresca instead of sour cream. They are a bit sweeter and add more depth to the flavors of Mexican dishes, especially spicy ones. Or add avocado if you don't like cream. You can also try using queso fresco or cotija cheese instead of shredded cheddar, which are crumbly white cheeses that are also used in Mexican cuisine. If you're trying to limit your carb intake, use butter lettuce leaves to make chicken lettuce wraps. Ooo, good idea Jackie! I'm gonna have to do that next time since I need to get serious about shedding these extra ten pounds I've gained this year. Especially considering it's only July! *sigh* :-/

Sunday, July 8, 2012

Patriotic Red Velvet Blueberry Cheesecake Cupcakes

I loved the way the liners were dyed from the Red Velvet and blueberries. They have this cool tie-dye effect that's very patriotic!
With the fourth of July falling midweek this year, people celebrated earlier or later than usual and I was no exception. I chose the early route because the sooner I can get a day off always seems to be better these days. I opted to travel to my hometown to spend time with my family and get out of my work-in-progress house for a bit. Things are coming along quite nicely with the remodel though, as I can now access everything I need to cook. There are still a couple of last steps left for it to be camera ready, so stay tuned! 
It was good as usual to see my family, but it had been way too long since I'd seen my sweet nephew. He was so much bigger than he was just a short month ago! I try to spend as much time as possible with him because he changes so much every time I see him. We enjoyed a little time in the pool and he seemed to like kicking around in his little baby float. Due to the kitchen remodel, we had to head home earlier than expected, so unfortunately, I didn't actually make these goodies until I was back at home.

Making too many of these sweets without having enough people to unload them on is a dangerous thing in our house. I have eaten one almost everyday since the fourth...yikes! It's really showing now too, so I may just have to implement a limit of one baked good per week. :(

Red Velvet Blueberry Cheesecake Cupcake Recipe

Let me start by admitting that I used a boxed Red Velvet Cake mix...oh, the shame! Well I'm not exactly a professional baker as you know, and I haven't experimented much with red velvet yet. I thought of this combination kinda last minute too, so I didn't have all day to get it right. Anyways, if you have a great red velvet recipe, definitely use that instead of the box mix, but they are still pretty darn good!

1 box of your choice of Red Velvet Cake, mix with ingredients as instructed.
24 vanilla wafers or graham crackers cutout with round cookie cutter to fit in baking cups
8 oz cream cheese, softened
1/4 cup sugar
1 tsp vanilla
6 oz fat-free vanilla Greek yogurt (I used Oikos)
2 large egg whites
1 tbsp all purpose flour
1 1/2 cup blueberries

Heat oven to 350°. Line cupcake tin with liners. Place a vanilla wafer or small graham cracker cutout at the bottom of each liner.

Gently beat cream cheese, sugar and vanilla until smooth using an electric mixer. Gradually beat in fat free yogurt, egg whites, and flour. Do not over beat. Gently fold in the fresh blueberries and scoop mixture into cupcake liners filling about one third of the liners. Smooth the mixture to provide a somewhat level surface for the next layer.

Now, scoop a layer of red velvet mix over the cheesecake mixture. Fill liners a little over 2/3 full and bake about 15-18 minutes or until a toothpick inserted comes out clean. Allow cupcakes to cool on cooling rack for about 15 minutes then transfer to fridge. Chill for at least an hour before frosting.

Frosting:
8 oz. cream cheese, at room temperature
6 tbsp. unsalted butter, at room temperature
1 tbsp. vanilla extract
3 cups confectioners' sugar, sifted
2 tbsp. heavy cream
1 cup blueberries for garnish

Combine the cream cheese and butter in the bowl of an electric mixer and beat on medium-high speed until smooth, about 1 minute. Blend in the vanilla extract. Beat in the confectioners’ sugar a little at a time until incorporated and smooth, 1-2 minutes. Be sure to taste the frosting as you add the sugar to ensure it does not become too sweet for your taste. Add the heavy cream to the bowl and beat on medium-low speed just until incorporated, then increase the speed to medium-high and whip for 4 minutes until light and fluffy, scraping down the sides of the bowl as needed.

Frost the cooled cupcakes as desired and top with fresh blueberries.